Share Videos from YouTube to Instagram: A Complete Practical Guide
You've created a fantastic YouTube video, poured hours into it, and now it's performing well. But how do you get it in front of a whole new audience on Instagram? The answer is repurposing. By taking your original video, reformatting it for Instagram's vertical world, and sharing it as a Reel, Story, or post, you can maximize your content's reach without starting from scratch.
This guide provides practical, actionable steps to turn your YouTube content into an Instagram growth engine.
Why Sharing YouTube Videos to Instagram Is a Smart Growth Play
Treating your YouTube and Instagram content as separate worlds is a missed opportunity. Thinking about how to share videos from YouTube to Instagram isn't just about saving time; it's a genuine growth strategy that taps into the unique strengths of both platforms.
YouTube is where people go for deep dives and long-form content. They're searching for specific information and are ready to invest their time. Instagram, however, is all about the scroll. It’s built for quick, captivating moments that grab attention in seconds. By repurposing your YouTube videos for Instagram, you’re essentially translating your core message for a faster-paced audience, which can easily double your content's reach. A single, well-made YouTube video can provide a full week's worth of Instagram clips.
Dive into a Video-First World
Instagram has completely shifted its focus. Its algorithm now heavily prioritizes video, especially Reels. This is great news for you, as it gives your repurposed YouTube clips a chance to find a new audience and maybe even go viral.
Think about the clear advantages here:
- Wider Audience: You get to connect with Instagram's massive user base, many of whom might never have stumbled upon your YouTube channel.
- More Value from Your Work: You squeeze every last drop of value from the time, energy, and money you invested in that original YouTube video.
- A Stronger Brand Presence: Posting consistently across different platforms keeps your brand visible and helps build a unified online identity.
The Viral Potential is Real
The numbers don't lie. Video is king on Instagram. In fact, it now accounts for over 60% of the time people spend on the app. This boom is driven by Reels, which get reshared an incredible 3.5 billion times every single day.
That statistic alone shows the massive potential waiting for your content. We're also seeing that video content is driving 57.4% year-over-year growth in engagement, leaving static images far behind.
Case Study in Action: A finance influencer, "Budget Boss," had a 20-minute YouTube video explaining "The 5 Rules of Investing." Instead of just posting a link, she created five separate 60-second Reels, each one explaining a single rule with dynamic text and a clear hook. The result? Her Reels series garnered over 2 million views, drove 50,00_ followers back to her full YouTube video, and doubled her Instagram follower count in a month. This is the power of a feedback loop where each platform supports the other.
Of course, this isn't just about cutting and pasting. A smart strategy is key. Your content needs to feel like it belongs on Instagram, not like a clunky afterthought. For more on this, you can check out these content creation best practices for tips on making your videos connect, no matter where you post them.
Preparing Your YouTube Video for an Instagram Audience
Let's be real: simply downloading a YouTube video and tossing it onto your Instagram profile is a recipe for low engagement. The platforms are built for completely different viewing habits, and what works on one will almost certainly fall flat on the other.
To succeed, you need to give your content a strategic makeover so it feels native to Instagram’s fast-paced, vertical world. This is where you transform a good video into a great, shareable clip.
Find Your "Golden Nuggets"
Think of yourself as a highlight detective for your own content. Your first job is to sift through your long-form YouTube videos and pinpoint those "golden nuggets"—the high-impact moments that can stand on their own.
These aren't just random snippets. You're looking for the concentrated value, the moments that really matter.
- The Big Reveal: What's the single most important takeaway or "aha!" moment?
- A Powerful Quote: Is there a memorable one-liner that perfectly sums up your point?
- A Quick Tutorial: Can you isolate a short, actionable tip that solves a specific problem?
- An Emotional Peak: Look for a funny, surprising, or touching moment that forges an instant connection.
Once you’ve identified these key segments, you're ready to start tailoring them for Instagram's very specific formats.
Trim for a Much Shorter Attention Span
Someone watching YouTube might settle in for a 15-minute deep dive. On Instagram, you're lucky if you get three seconds of their attention before they scroll on.
This means you have to be absolutely ruthless with your editing. The goal is to isolate that golden nugget and trim it down to fit Instagram’s tight time limits, all without losing its core message.
Actionable Example: Imagine your YouTube video is a 10-minute recipe for homemade pasta. Don't just show a random 60 seconds of mixing. Instead, isolate the visually satisfying 15-second clip of the pasta dough being rolled and cut perfectly. This "money shot" is far more likely to stop a scroller in their tracks and make them curious about the full process.
You aren't just shortening a video; you're crafting a compelling micro-story. Hook them immediately, deliver the value, and end with a punchy conclusion or a clear call to action.
Master the Vertical Format
The most jarring difference between YouTube and Instagram is the screen orientation. YouTube is a 16:9 horizontal (landscape) world, while Instagram is dominated by the 9:16 vertical (portrait) experience. Posting a horizontal video on a vertical platform instantly screams "repost" and looks out of place.
Switching up the aspect ratio is non-negotiable. When you reformat a 16:9 video to 9:16, you’ll almost always need to reframe the shot to keep your main subject centered. This often involves cropping the sides of the original footage, so it pays to choose clips where the important action is already happening in the middle of the frame.
Making this one adjustment makes your content look intentional, professional, and designed specifically for the person watching it on their phone.
To take it a step further, especially when crafting captions or on-screen text, it helps to transcribe YouTube videos first. Having a text version of your audio makes it incredibly easy to pull out key phrases for headlines that grab attention, even when people are watching with the sound off.
Instagram vs YouTube Video Format Cheat Sheet
Navigating the technical specs for each platform can be a headache. Here’s a quick reference guide to help you get your video formatting right every single time.
| Specification | Instagram Reels | Instagram Stories | Instagram Feed Post | YouTube Shorts | YouTube Standard |
|---|---|---|---|---|---|
| Aspect Ratio | 9:16 (Vertical) | 9:16 (Vertical) | 1:1, 4:5, 9:16 | 9:16 (Vertical) | 16:9 (Horizontal) |
| Max Duration | 90 Seconds | 60 Seconds | 60 Minutes | 60 Seconds | 12+ Hours |
| Resolution | 1080 x 1920 | 1080 x 1920 | 1080 x 1350 (4:5) | 1080 x 1920 | 1920 x 1080 (HD) |
Keep this cheat sheet handy. Matching these specs is the foundation for making your repurposed content look and feel like it was made for Instagram from the very start.
Your Workflow for Downloading and Repurposing Videos
So, you’ve picked out the perfect golden nuggets from your YouTube channel. Now what? The next step is getting those clips off YouTube, onto your computer, and dressed up for their big Instagram debut. This is all about downloading your own content and then using a video editor to reshape it for a vertical-first world.
First things first, you need the actual video file. The absolute best way to do this is to find the original file you uploaded in the first place. Check your computer, your Google Drive, or wherever you store your source files. Starting with the original ensures you're working with the highest possible quality—no compression artifacts, no fuss.
Picking the Right Tools for the Job
Can't find the original? It happens. You’ll need to download the video from your YouTube channel. While there are a million third-party tools out there, be careful. Stick with a reputable service that respects YouTube's terms of service. You're looking for something that gives you a clean, high-resolution download without slapping a watermark on your work.
Once you've got the video file, it's time to edit. You don't need to splurge on professional-grade software like Final Cut Pro or Adobe Premiere Pro. Honestly, a free and surprisingly powerful tool like CapCut has everything you need to trim, resize, and add those engaging touches that make a video pop on Instagram.
This is basically a three-stage process: grab your clip, trim it down, and reformat it.
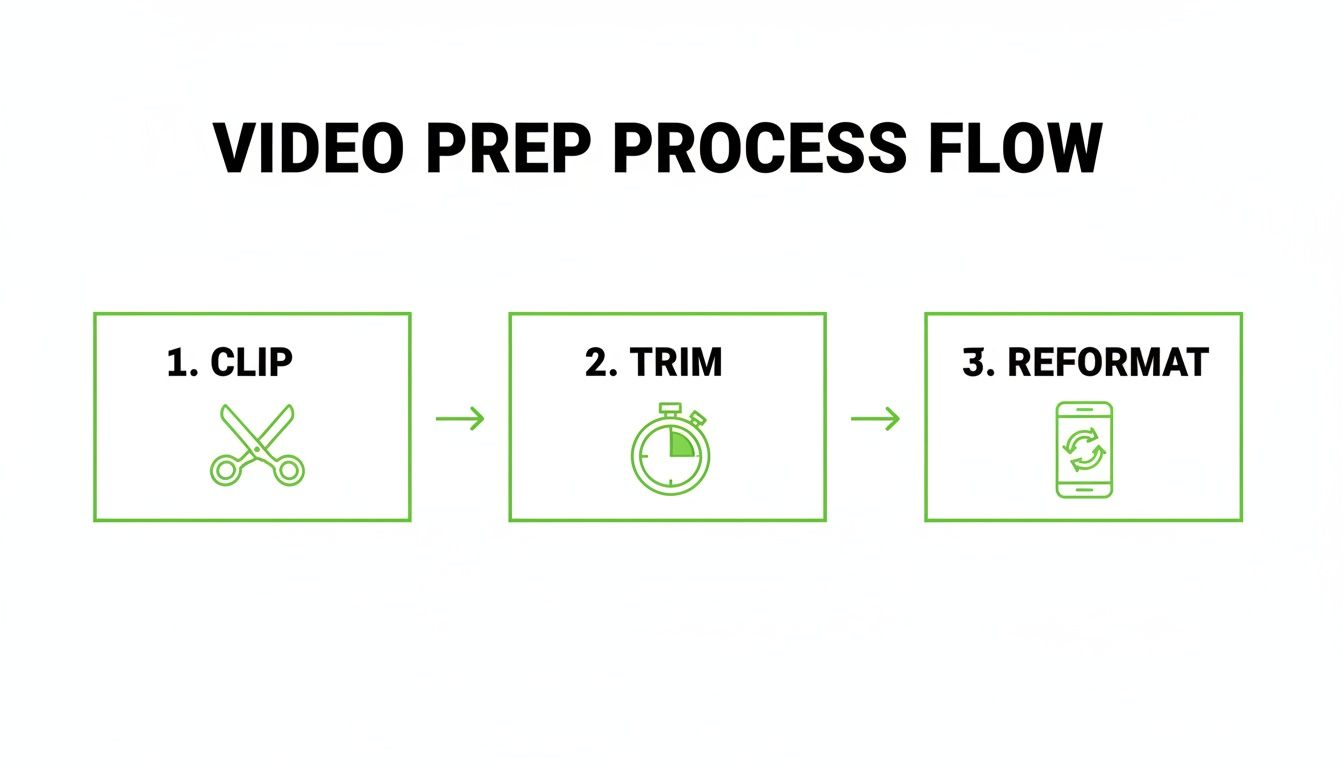
It’s that simple. You find the key moment, chop it down to just the essentials, and flip it vertically for Instagram's layout.
A Practical Walkthrough Using CapCut
Let's walk through a real-world scenario. Say you have a 15-minute YouTube podcast episode and want to pull out a killer 45-second soundbite from an expert guest to post as a Reel.
- Import and Flip: Pop open CapCut and import your podcast video. The very first thing you should do is hit the "Ratio" button and select 9:16. Boom. Your video is now in the vertical format that’s perfect for Reels and Stories.
- Trim the Fat: Now, scrub through your video's timeline to find the exact start and end of that soundbite. Use the split tool to isolate the clip you want, and then just delete everything else. You’re left with a short, punchy, high-impact segment.
- Add Dynamic Captions: This is non-negotiable for Instagram. So many people watch with the sound off. Use CapCut's "Auto captions" feature. It’ll listen to the audio and generate synchronized text right on the screen. Give them a quick proofread, pick a bold, easy-to-read font, and you’re good to go.
Case Study: The "Creator's Edge" podcast did exactly this. They took key advice from their YouTube interviews, turned them into Reels with bold captions and a simple progress bar, and saw a 300% increase in profile visits. Their most successful clips not only went viral on Instagram but also drove a significant increase in subscribers to their full episodes on YouTube.
This whole strategy of adapting your existing videos for new platforms is called content repurposing. It's one of the smartest ways to get more mileage out of the hard work you’ve already put in.
How to Make Your Content Unskippable
To really nail this, you need a few extra layers of engagement. A simple progress bar at the bottom of the screen is a classic trick that subconsciously encourages people to watch until the end. You can also add on-screen text or emojis to highlight the most important words or reactions.
The data backs this up. On social media, video posts get 50% more views than static ones. And for Instagram specifically, a whopping 88% of marketers say video gives them a positive ROI. Since videos are also twice as likely to be shared, you're creating a powerful cycle of engagement.
Ultimately, this isn't just about following technical steps. It's about meeting your audience where they are and giving them content in the format they prefer. If you find yourself doing this a lot and want to speed things up, you might even look into an AI short video generator to automate most of the heavy lifting.
Getting Your Video on Instagram for Maximum Impact
You've done the hard work of downloading and reformatting your YouTube video. Now for the fun part: posting it where it will make the biggest splash. Each of Instagram's video formats—Reels, Stories, and your main Feed—has its own personality and audience expectations. Knowing how to play to their strengths is what separates a random upload from a strategic win.
It’s all about matching the vibe of your content to its placement. That fast-paced, high-energy clip from your latest vlog? It's begging to be a Reel. The candid, behind-the-scenes Q&A? That's perfect for your Stories.
Nail Your Post with Instagram Reels
Think of Reels as Instagram's discovery engine. This is where you go to get in front of fresh eyes and, hopefully, go viral. When you're posting a snippet from YouTube as a Reel, your number one job is to stop the scroll for people who have no idea who you are.
To make that happen, you need to zero in on a few key things:
- The Hook: Seriously, the first three seconds are all that matter. Lead with a bold claim, a burning question, or the most visually stunning moment of your entire clip. Don't warm up; start hot.
- Trending Audio: Even though your YouTube clip has its own sound, layering in a popular, trending song or audio clip (you can turn the volume way down) is a powerful signal to the Instagram algorithm. It basically tells the platform, "Hey, this content is relevant right now," which can give you a nice visibility boost.
- A Killer Cover: Never leave your cover image to chance. Instagram will almost always pick the most awkward, blurry frame possible. Instead, choose a crisp, eye-catching image and add a text overlay that screams "watch me!" This is your video's billboard on your profile grid and the Explore page.
The length of your Reel also plays a huge role in its performance. For a deep dive into the sweet spot, check out our guide on how long an Instagram Reel should be for some data-backed tips.
Spark Action with Instagram Stories
Stories are where you connect with the people who already follow you. They're casual, they disappear in 24 hours, and they're built for interaction. This is your go-to spot for driving traffic and having real conversations.
Make the most of the unique tools Stories give you:
- Interactive Stickers: Don't just post a video; make it a two-way street. Use polls, quizzes, and question boxes to get people involved. For instance, after sharing a clip of a product review, throw up a poll sticker asking, "Would you buy this?"
- The Link Sticker: This is pure gold for getting people off Instagram and onto your YouTube channel. Post your video teaser, then use the link sticker with a super clear call-to-action like "Watch the full review!" or "Finish the tutorial on YouTube!"
Actionable Example: A travel vlogger posts a 30-second teaser of their latest YouTube video about "3 Days in Tokyo" to their Instagram Story. On the next Story slide, they use a quiz sticker asking "Which district should I visit first?" with options like Shinjuku and Shibuya. The final slide has the "Link Sticker" with the text "See my full Tokyo itinerary on YouTube now!" This interactive sequence builds engagement before driving traffic.
Make it Last with Feed Posts
While Reels are for discovery, a video on your main feed is for your loyal followers. It's a more permanent piece of content that lives on your profile grid. Since feed videos can now be up to 60 minutes long, this is the place for high-value, evergreen content that can stand on its own.
Think of it as a highlight reel of your best YouTube stuff. It's the perfect home for a condensed tutorial, a short but powerful testimonial, or a quick listicle. The caption is your best friend here. Use it to start a real conversation—ask open-ended questions and encourage your audience to share their own thoughts. With a feed post, the goal is genuine engagement, not just a quick view.
Pro Tips for Driving Engagement and Reach
Getting your YouTube video onto your Instagram profile is a great start, but it’s really just the first step. The real challenge—and where the magic happens—is making sure people actually watch it, engage with it, and feel compelled to see more. This is where you switch gears from technical uploader to savvy marketer.
Think about it: a truly great caption can be the one thing that stops someone from scrolling right past your post. It’s your chance to add context, stir up some curiosity, or just give your audience a reason to care about the clip they’re about to watch.
The first hour after you post is your golden window. Engaging promptly with comments and DMs sends a powerful signal to the Instagram algorithm that your content is valuable, which can significantly boost its visibility in user feeds and on the Explore page.
Master Your Hashtag Strategy
Hashtags are basically the search engine of Instagram. They’re how you get your content in front of people who don't already follow you. A classic rookie mistake is slapping on generic tags like #video or #youtuber. Sure, they get a ton of traffic, but your content will be buried in seconds.
A much smarter way to go is using a strategic mix:
- Broad Tags (1-2): Think high-level topics related to your video, like
#digitalmarketing. - Niche Tags (3-5): Get more specific to attract a dialed-in audience, like
#videomarketingtips. - Community Tags (2-3): Tap into existing communities with hashtags they already use, such as
#solopreneurlife. - Branded Tags (1): Create a unique tag just for your brand or a specific video series. This is perfect for building a library of your content and encouraging your followers to use it, too.
Create an Irresistible Call to Action
Your Instagram clip should be a teaser—a compelling trailer that makes people need to see the main event on your YouTube channel. But you can't assume they'll figure out what to do next. You have to tell them, clearly and directly, with a strong call-to-action (CTA).
Dropping a lazy "link in bio" just doesn't cut it anymore. Go for something more active that highlights the benefit. For instance, try "Want the full breakdown? Tap the link in our bio for the complete tutorial!" This creates a bit of urgency and tells them exactly what they'll get for their click.
Tapping into this cross-platform energy is a huge opportunity. The short-form video explosion is real—YouTube Shorts are now pulling in 70-90 billion daily views. That momentum carries over to Instagram, where Reels are reshared 3.5 billion times daily and now account for 50% of the time users spend on the app. This shows just how hungry audiences are for this kind of content. If you want to dig deeper into these trends, check out the full research from Sprout Social.
Answering Your Top Questions About Sharing YouTube Videos
Even when you have a solid plan, a few questions always seem to pop up when you're moving content from YouTube to Instagram. Let's run through some of the most common ones I hear to get you past any roadblocks.
Is It Okay to Post Someone Else’s YouTube Video?
This is a big one, and the answer is a hard no, unless you have their direct, explicit permission.
Grabbing another creator’s video and posting it as your own is a serious misstep. It’s not just bad etiquette; it’s a violation of copyright law and Instagram’s own rules. This can get your post removed, earn your account a strike, or even lead to a full-on suspension. It’s just not worth the risk.
The best and safest strategy is to stick to repurposing your own original content. Now, if you're making something like a reaction video that might fall under "fair use," you're in a bit of a gray area. My advice? Still try to get permission and always give prominent, clear credit to the original creator in your caption and on-screen.
How Can I Make My YouTube Link Clickable?
Ah, the classic Instagram link frustration. You can't just drop a clickable link into the caption of a Reel or a feed post—it simply won't work. Instagram intentionally keeps traffic on its platform, so they make it tricky.
But don't worry, you've got a couple of great workarounds:
- The Link in Your Bio: This is your prime real estate. Think of it as your digital business card. Your captions should constantly point people there with a strong call-to-action like, "Full video is live! Tap the link in my bio to watch."
- The Instagram Story Link Sticker: This little feature is a game-changer. You can add a direct, tappable link to any Story, which is perfect for driving your followers straight to a new YouTube video.
Should I Post the Full Video or Just a Teaser?
For Instagram, a short, punchy teaser clip is almost always the right move. Remember, your goal here isn't to get a "view" on Instagram; it's to create enough curiosity to drive people over to YouTube where your full-length content lives.
Treat your Instagram clip like a movie trailer. Your job is to show off the best moments, hint at the value, and leave your audience wanting more. A well-edited 30 to 60-second highlight that ends right before the big reveal will outperform a clunky, multi-minute segment every time.
Ready to create scroll-stopping short videos from your content without the hassle? MotionLaps uses AI to turn your ideas into viral-ready videos in minutes, handling everything from scripting to final edits. Streamline your video creation with MotionLaps today!