Convert Photo to Watercolor: A Creator’s Practical Guide
You've got a few solid options to convert a photo to watercolor, and the best one really depends on what you're trying to achieve. You can go the quick-and-easy route with AI tools and mobile apps, or you can get your hands dirty with more manual techniques in software like Photoshop.
AI generators are definitely the fastest—you just give them a photo and a prompt, and you're done. But if you're after total creative freedom, nothing beats the control you get from doing it yourself.
Why Bother with Watercolor Effects, Anyway?

Turning a regular photo into something that looks like a watercolor painting is about more than just a filter; it's about changing the entire mood. This classic artistic style injects a dose of emotion, softness, and personality that a sharp, clean digital photo just can't match. For anyone creating content for visually-driven platforms like TikTok or Instagram, that's a huge win.
Those little details—the soft color bleeds, the hint of paper texture, the gentle color shifts—make your content feel handcrafted and authentic. That human touch forges a stronger connection with your audience, making your stories stick and your brand feel more real. Before zeroing in on watercolor, it's helpful to get a feel for the bigger picture of how to turn photos into art in general.
From Paintbrushes to Pixels
Not too long ago, getting this look meant you needed actual artistic talent, a stash of expensive supplies, and a lot of patience. Today, that's all changed. Digital tools have put the power to create beautiful watercolor-style visuals into everyone's hands, letting you knock them out in minutes instead of hours.
This shift has been supercharged by powerful software and, more recently, by artificial intelligence. You can see just how much demand there is for this stuff by looking at the numbers. The AI image editing market is expected to rocket to $10.2 billion by 2027, growing at a staggering 17.8% each year. This boom shows that people are hungry for automated tools that can turn a photo into watercolor art, making professional-quality content available to anyone.
The Bottom Line: The biggest advantage of going digital for watercolor effects is the time you save. What used to take a skilled artist hours to create can now be done in seconds, freeing you up to focus on creating more great content, more often.
Photo to Watercolor Methods at a Glance
With so many ways to get this look, it helps to see them side-by-side. This table breaks down the most common methods so you can quickly decide which approach is right for your project.
| Method | Best For | Skill Level | Speed |
|---|---|---|---|
| AI Generators | Fast, unique results for social media & concepts. | Beginner | Seconds |
| Photoshop Actions | Consistent, high-quality effects for branding. | Beginner-Intermediate | Minutes |
| Mobile Apps | On-the-go edits & quick social posts. | Beginner | Seconds to Minutes |
| Manual Photoshop | Maximum creative control & professional results. | Intermediate-Advanced | 30+ Minutes |
| GIMP (Free) | Budget-friendly projects with good control. | Intermediate | 20+ Minutes |
Each of these has its place. AI is fantastic for experimentation, while manual Photoshop work gives you unparalleled control for that one perfect shot.
In this guide, we’ll break down the most effective methods out there. We’ll cover everything from one-click AI solutions perfect for churning out content to the more nuanced techniques for when you need to get every detail just right. You’ll walk away knowing not just how to do it, but why you might choose one method over another.
Get Instant Results with AI Image Generators
If you need a stunning watercolor effect and don't have the time—or the desire—to fiddle with Photoshop layers, AI tools are your fastest route. They completely skip the technical hurdles, letting you jump straight to the creative part. You're not just slapping on a filter; you’re telling an AI what you want, and it paints a brand-new image for you.
Think of it less like editing and more like a collaboration. You provide the original photo and the artistic direction with a few words, and the algorithm does the heavy lifting. This approach unlocks creative styles that used to require years of artistic training or deep software knowledge.
Writing a Prompt That Actually Works
The real magic behind AI image generation is the prompt. Your words are the paintbrush, so the more specific you are, the better the result will be. You have to think like an artist giving instructions.
Don't just say, "turn this into a watercolor." That's too vague. Instead, use descriptive phrases to paint a picture for the AI.
- For a soft, dreamy vibe: Try something like, "ethereal watercolor painting of [your subject], soft ink wash, gentle color bleeds, minimal detail."
- For a classic, textured piece: Go with, "vibrant watercolor illustration of [your subject] on heavy, textured cold-press paper, visible paper grain, rich pigments."
- For a bold, modern look: Experiment with prompts like, "graphic novel watercolor style, bold ink outlines, bright color splashes, dynamic composition."
You're giving the AI the context it needs to nail the exact look you're picturing. And just as AI can transform your photos in an instant, the best cross stitch pattern maker can do the same for different kinds of craft projects.
Case Study: A Quick Walkthrough with the Flux kontext AI tool
Let's look at a practical example. Say you have a standard product shot of a coffee mug you want to use in a social media video. With an AI tool like the Flux kontext AI tool, you just upload your photo and type in your prompt.
The tool lets you write your prompt right next to your uploaded image, making the whole process incredibly straightforward. You pair a clear photo with a detailed prompt, and you'll get a unique piece of art in seconds.
Most of these tools also have a ‘style strength’ or ‘influence’ slider, and this is where you can really fine-tune the output. A low setting keeps the image looking very similar to the original photo, just with a light watercolor touch. Cranking it up gives the AI more creative license, resulting in something more abstract and painterly. It’s the perfect way to make sure the final image fits your brand's style. For more ideas, you can check out other great AI content creation tools.
These tools have completely changed the game. Since 2022, AI has generated over 15 billion images. That’s a clear signal that the way we create visuals is undergoing a massive shift. Audiences are now used to seeing AI art, which makes it a smart and effective choice for any modern marketing campaign.
Getting Full Creative Control in Photoshop
Sometimes, those one-click AI tools just don't give you the precision you need for a truly signature look. When you want to craft a unique, repeatable watercolor style from the ground up, nothing beats rolling up your sleeves in Adobe Photoshop. This isn't about slapping on a simple filter; it's about building a non-destructive workflow that puts you in complete command of every brushstroke and texture.
The whole process hinges on one key feature: Smart Filters. Before you do anything else, convert your main image layer to a Smart Object. This simple step is a game-changer because it makes every filter you apply completely editable. You can circle back anytime to tweak a setting without ever damaging your original photo—a must for any professional workflow.
Building the Base Effect
First things first, let's create that foundational watercolor appearance. This isn't a single action but a thoughtful combination of filters stacked together to mimic how real paint bleeds and settles on paper.
A solid, professional-grade workflow usually involves a specific sequence of filters:
- Median Filter: You might be surprised, but this is a fantastic starting point. It works by smoothing out the tiny details and simplifying color patches, creating those soft, blended areas that look like wet pigments spreading across the page.
- Dry Brush Filter: Once the Median filter has done its job, head over to the Filter Gallery and apply the Dry Brush. This is what breaks up those smooth gradients, adding that essential texture and rough-edging that screams "painterly."
You can stack both of these within the same Smart Filter group, which lets you dial in the intensity of each one until the base looks just right. It’s this combination that creates a believable, artistic foundation to build on.
While we're diving deep into a manual process here, it's helpful to contrast it with the simpler AI approach.
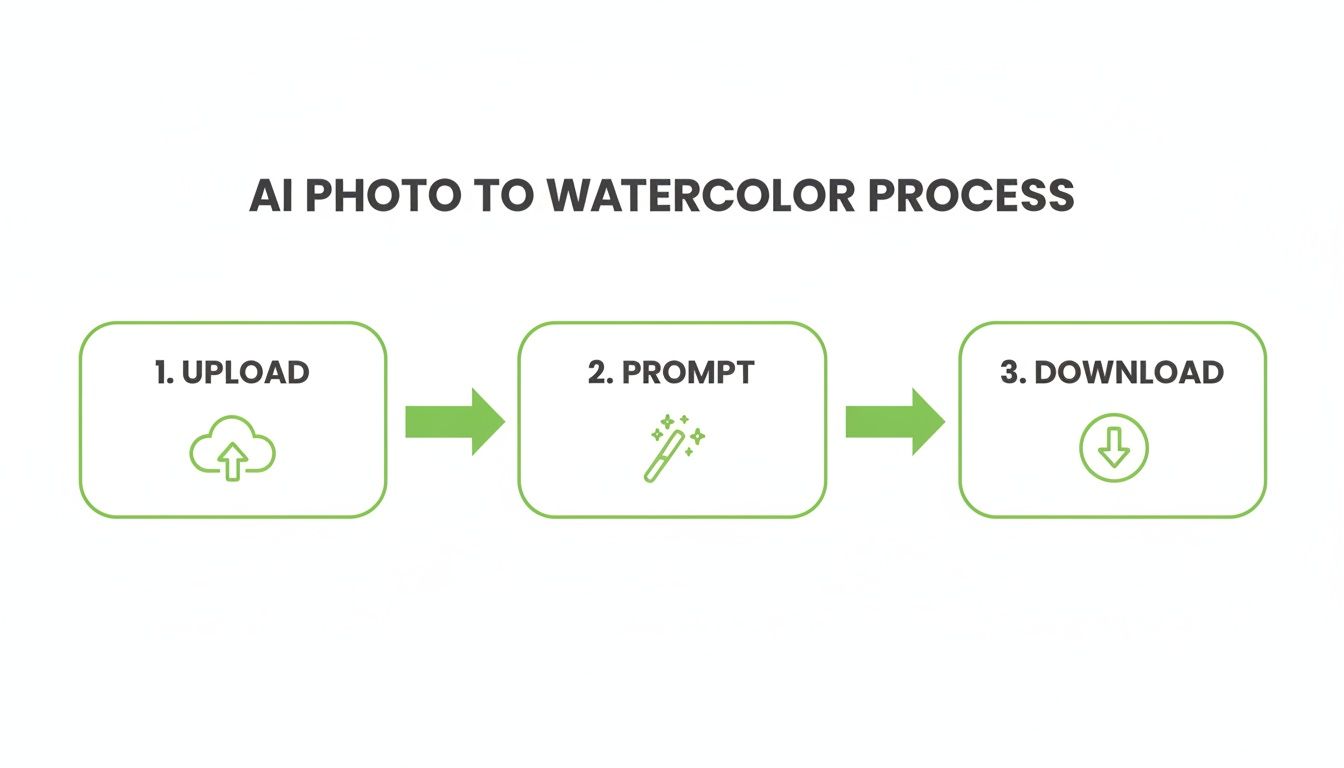
As you can see, the AI workflow is boiled down to just three actions. The manual method in Photoshop, on the other hand, is a much more layered and iterative journey.
Adding Authentic Textures and Details
A flat watercolor effect is a dead giveaway that it's digital. The real magic, the secret to a convincing result, lies in the texture. This is where we bring in elements that feel like they belong in the real world.
Find yourself a high-quality scan or photo of watercolor paper texture. Drop this onto a new layer right above your photo layer. Now, change this layer's blend mode to something like Multiply or Overlay. Instantly, you'll see the paper grain merge with your image, adding a ton of depth and realism.
Pro Tip: Don't just stop with one texture. I often layer multiple textures—a base paper grain, some subtle paint splatters, and maybe a few soft water stains. By playing with the opacity of each texture layer, you can build an incredibly rich and authentic final piece.
Next up, let's refine the effect using Layer Masks. Grab a soft, textured brush and paint on the mask of your main image layer. This allows you to selectively "erase" parts of the effect, which is perfect for creating those soft, bleeding edges or suggesting areas where the paint would be thinner.
The entire goal here is to break up that uniform, digital perfection and introduce the beautiful, chaotic imperfections you find in traditional watercolor art. This is a level of detail that automated tools often skim over, and it's what will give your work a truly handcrafted feel. Learning how to turn an image into an illustration with these manual techniques can seriously elevate your creative portfolio. You're not just applying an effect; you're making deliberate artistic choices to guide the viewer's eye and evoke a specific mood.
Creating Watercolor Art with Free and Mobile Tools
You don't need a hefty budget or a top-of-the-line desktop to create stunning watercolor effects. In fact, some of the most powerful and accessible tools for turning a photo into a watercolor masterpiece are probably already in your pocket. Free and mobile apps offer incredible flexibility and speed, letting you produce high-quality art without the steep learning curve of professional software.
This means you can go from a quick snapshot to a finished piece of art while waiting in line for coffee. For anyone creating content for social media, that kind of turnaround is a game-changer. The trick is knowing which tools to trust and how to get the most out of them.
Replicating Pro Techniques in GIMP
If you're looking for Photoshop-level control without the subscription fee, GIMP (GNU Image Manipulation Program) is your answer. This open-source powerhouse lets you replicate many of the same professional techniques—like layering textures and using masks—to build an authentic watercolor look from the ground up.
The process will feel familiar if you've ever dabbled in photo editing. Start by importing your image, then find a high-quality watercolor paper texture online (a quick search will turn up tons of free options). You'll want to place this texture on a new layer above your photo and set the blend mode to Multiply. Instantly, your image will take on that classic paper grain.
From there, it's all about artistry. Play around with GIMP’s built-in artistic filters, like "GIMPressionist" or "Cartoon," to simplify the photo's details and create a painterly base. To finish it off, add a layer mask and use a soft, textured brush to gently "erase" parts of the image. This simulates the soft, bleeding edges you see in real watercolor paintings.
Top Mobile Apps for On-the-Go Creation
When you need to create something beautiful right now, mobile apps are your best friend. They are built for speed and simplicity, letting you generate incredible art in just a few taps.
Here are a couple of my go-to options:
- Waterlogue: This app is a true specialist. It does one thing and does it exceptionally well: creating beautiful, authentic-looking watercolor images. Its real strength is its set of intelligent presets that analyze your photo and apply effects mimicking different painting styles, from loose, wet-on-wet washes to more detailed illustrations.
- Prisma: While Prisma is known for a wide range of artistic filters, its watercolor styles are fantastic. It uses AI to completely reimagine your photos, often producing bold and vibrant results that really pop on a busy social media feed.
The workflow in these apps is dead simple. Just import your photo, swipe through the different style presets until one catches your eye, and then fine-tune it with sliders for intensity, brightness, or color. You can have a share-ready image in less than a minute.
Comparing Top Free and Mobile Watercolor Apps
Choosing the right tool often comes down to your specific project and workflow. This quick comparison breaks down the key differences between these powerful options to help you decide which one fits your creative needs.
| Tool Name | Platform | Key Feature | Best For |
|---|---|---|---|
| GIMP | Desktop (Free) | Full manual control with layers & masks. | Budget-conscious creators needing precision. |
| Waterlogue | iOS/Windows | Specialized, high-quality watercolor presets. | Achieving authentic, classic watercolor looks. |
| Prisma | iOS/Android | AI-powered artistic filters with vibrant results. | Quick, eye-catching social media visuals. |
Ultimately, whether you choose the granular control of a desktop tool like GIMP or the instant gratification of a mobile app, you have everything you need to start creating beautiful watercolor art without spending a dime.
Getting That Hand-Painted Watercolor Look
If you really want to convert a photo to watercolor and have it look convincing, you have to think past the first filter you apply. The secret is to chase the beautiful imperfections that make traditional art feel so alive. Digital tools tend to smooth everything over, but true authenticity is built layer by layer—with texture, careful color choices, and the right starting image.
Speaking of which, it all begins with the photo you choose. I've found that the best images for a watercolor effect have strong contrast and a really clear subject. Think of a portrait with dramatic lighting or a landscape with a sharp horizon line. These translate beautifully. On the other hand, a busy, flatly lit scene often just turns into a muddy, confusing mess.
Nailing the Color and Texture
A dead giveaway of a digital effect is color that's way too bright and perfectly saturated. Real watercolor paints are a bit more muted. Once you have your basic effect applied, try pulling the saturation back just a little. This simple tweak alone can give your colors a more natural, earthy quality that makes a massive difference.
Next up is texture—this is where the real magic happens. It’s the soul of a watercolor painting.
- Paper Grain: The first thing I always do is find a high-resolution photo of real watercolor paper. I overlay this on top of my image and set the layer's blend mode to 'Multiply' or 'Overlay'. This instantly integrates that tangible paper grain into the art.
- Rough Edges: To get rid of those sharp, digital lines, use a layer mask with a soft, textured brush. Gently paint away at the edges of your subject to mimic how paint bleeds and softens on actual paper.
- Paint Splatters: As a final touch, I like to add a new layer with some subtle paint splatters. Placing them strategically near the edges or in some of the empty areas adds a bit of organic energy and movement.
The most believable watercolor effects are the ones that embrace a little bit of chaos. Let the colors bleed. Let the paper texture show through. Those "flaws" are what make a digital image feel like it was painted by hand.
From Static Image to Video Content
Once you’re happy with your watercolor masterpiece, it’s time to get it ready for video. I recommend exporting it as a high-quality PNG or JPG to keep all those nice details intact. For most social media videos, a resolution of 1920×1080 pixels works perfectly.
When you bring the image into your video editor, you can add a little life to it. A slow zoom or a gentle pan (you might know this as the Ken Burns effect) is a great way to create movement without being distracting. These images also make fantastic artistic backgrounds for text or even unique transitions between video clips, giving your project a handcrafted feel. If you're curious about other ways to transform visuals, the techniques behind AI style transfer offer a much deeper look into creating unique artistic effects for your videos.
Common Questions About Creating Watercolor Effects
Even with the best tools in hand, you're bound to run into a few questions when you start turning photos into watercolor art. Let's walk through some of the most common hurdles I see people face, with practical answers to help you get the look you're after.
What Photos Work Best for a Watercolor Effect?
This is probably the most important part of the whole process. Your starting photo makes all the difference.
I've found that high-contrast images with a really clear subject work wonders. Think of portraits with bold shadows, landscapes with a sharp horizon line, or buildings with strong, clean angles. These give the effect a solid foundation to build on.
On the other hand, photos that are too "busy" or have very low contrast can end up looking like a muddy mess once you apply the effect. The soft, bleeding nature of watercolor needs those defined shapes to look good. And always, always start with the highest resolution file you have.
Can I Convert a Photo to Watercolor Without Photoshop?
Definitely. Photoshop gives you incredible control, but it's far from the only game in town.
If you want something quick and completely unique, AI tools are fantastic. The Flux kontext AI tool, for example, can dream up some gorgeous watercolor styles just from a simple text prompt and your source image.
For those who still want that hands-on control but without the price tag, free software like GIMP is a seriously powerful alternative. And for on-the-go creations, mobile apps like Waterlogue or Prisma are perfect for getting that one-tap magic, ready to post straight to social media.
How Do I Make My Digital Watercolor Look More Realistic?
Getting that authentic feel really boils down to three things: texture, edges, and color.
- Texture is huge. Find a high-quality paper texture image online, drop it on top of your artwork, and set its blend mode to ‘Multiply.’ This instantly adds that gritty, tactile feel of real paper.
- Fix the edges. Nothing screams "digital" like perfectly sharp lines. I always use a soft, textured brush on a layer mask to gently rough up and soften the borders of my main subject. This mimics how real paint bleeds into the paper.
- Dial back the color. Digital colors can be way too bright. Try desaturating your final image just a little bit. This helps it look more like it was made with real, muted pigments instead of glowing pixels.
One of the biggest mistakes I see is leaving the edges too clean. Real watercolor has soft, unpredictable borders where the water and pigment dry on the paper. If you can get that part right, you're 90% of the way to a believable result.
How Can I Use Watercolor Images in My Videos?
Watercolor visuals are amazing for video content. They make for beautiful intros, eye-catching backgrounds, or just a cool stylistic overlay for your social media clips.
Once you have your final image, just import it into your video editor.
A simple trick is to add a slow zoom or pan (you might know it as the Ken Burns effect) to give it some gentle, elegant movement. You can also chop them up and use them as artistic transitions between scenes or as a textured backdrop for text. It's a great way to add a handcrafted, personal touch to your video's story.
Ready to create stunning visuals for your videos without all the manual work? MotionLaps uses AI to turn your ideas into viral-ready short-form content in minutes. From generating artistic styles to handling the entire video production pipeline, it's the ultimate tool for creators. Explore what you can create at https://motionlaps.ai.